I profess, I am not one to jump on the January bandwagon of goals and resolutions. Not that I’m against getting organized–far from it. I truly want to have an organized and efficient home. I do like checklists and setting goals, though I’ve learned to do so in pencil, because I have trouble with the follow-through. For me, as a homeschool momma, I tend to have my inspiration for such things in the August/September timeframe as I prepare for the new school year. It usually goes well till about mid-October, then I lose steam until Christmas planning begins.
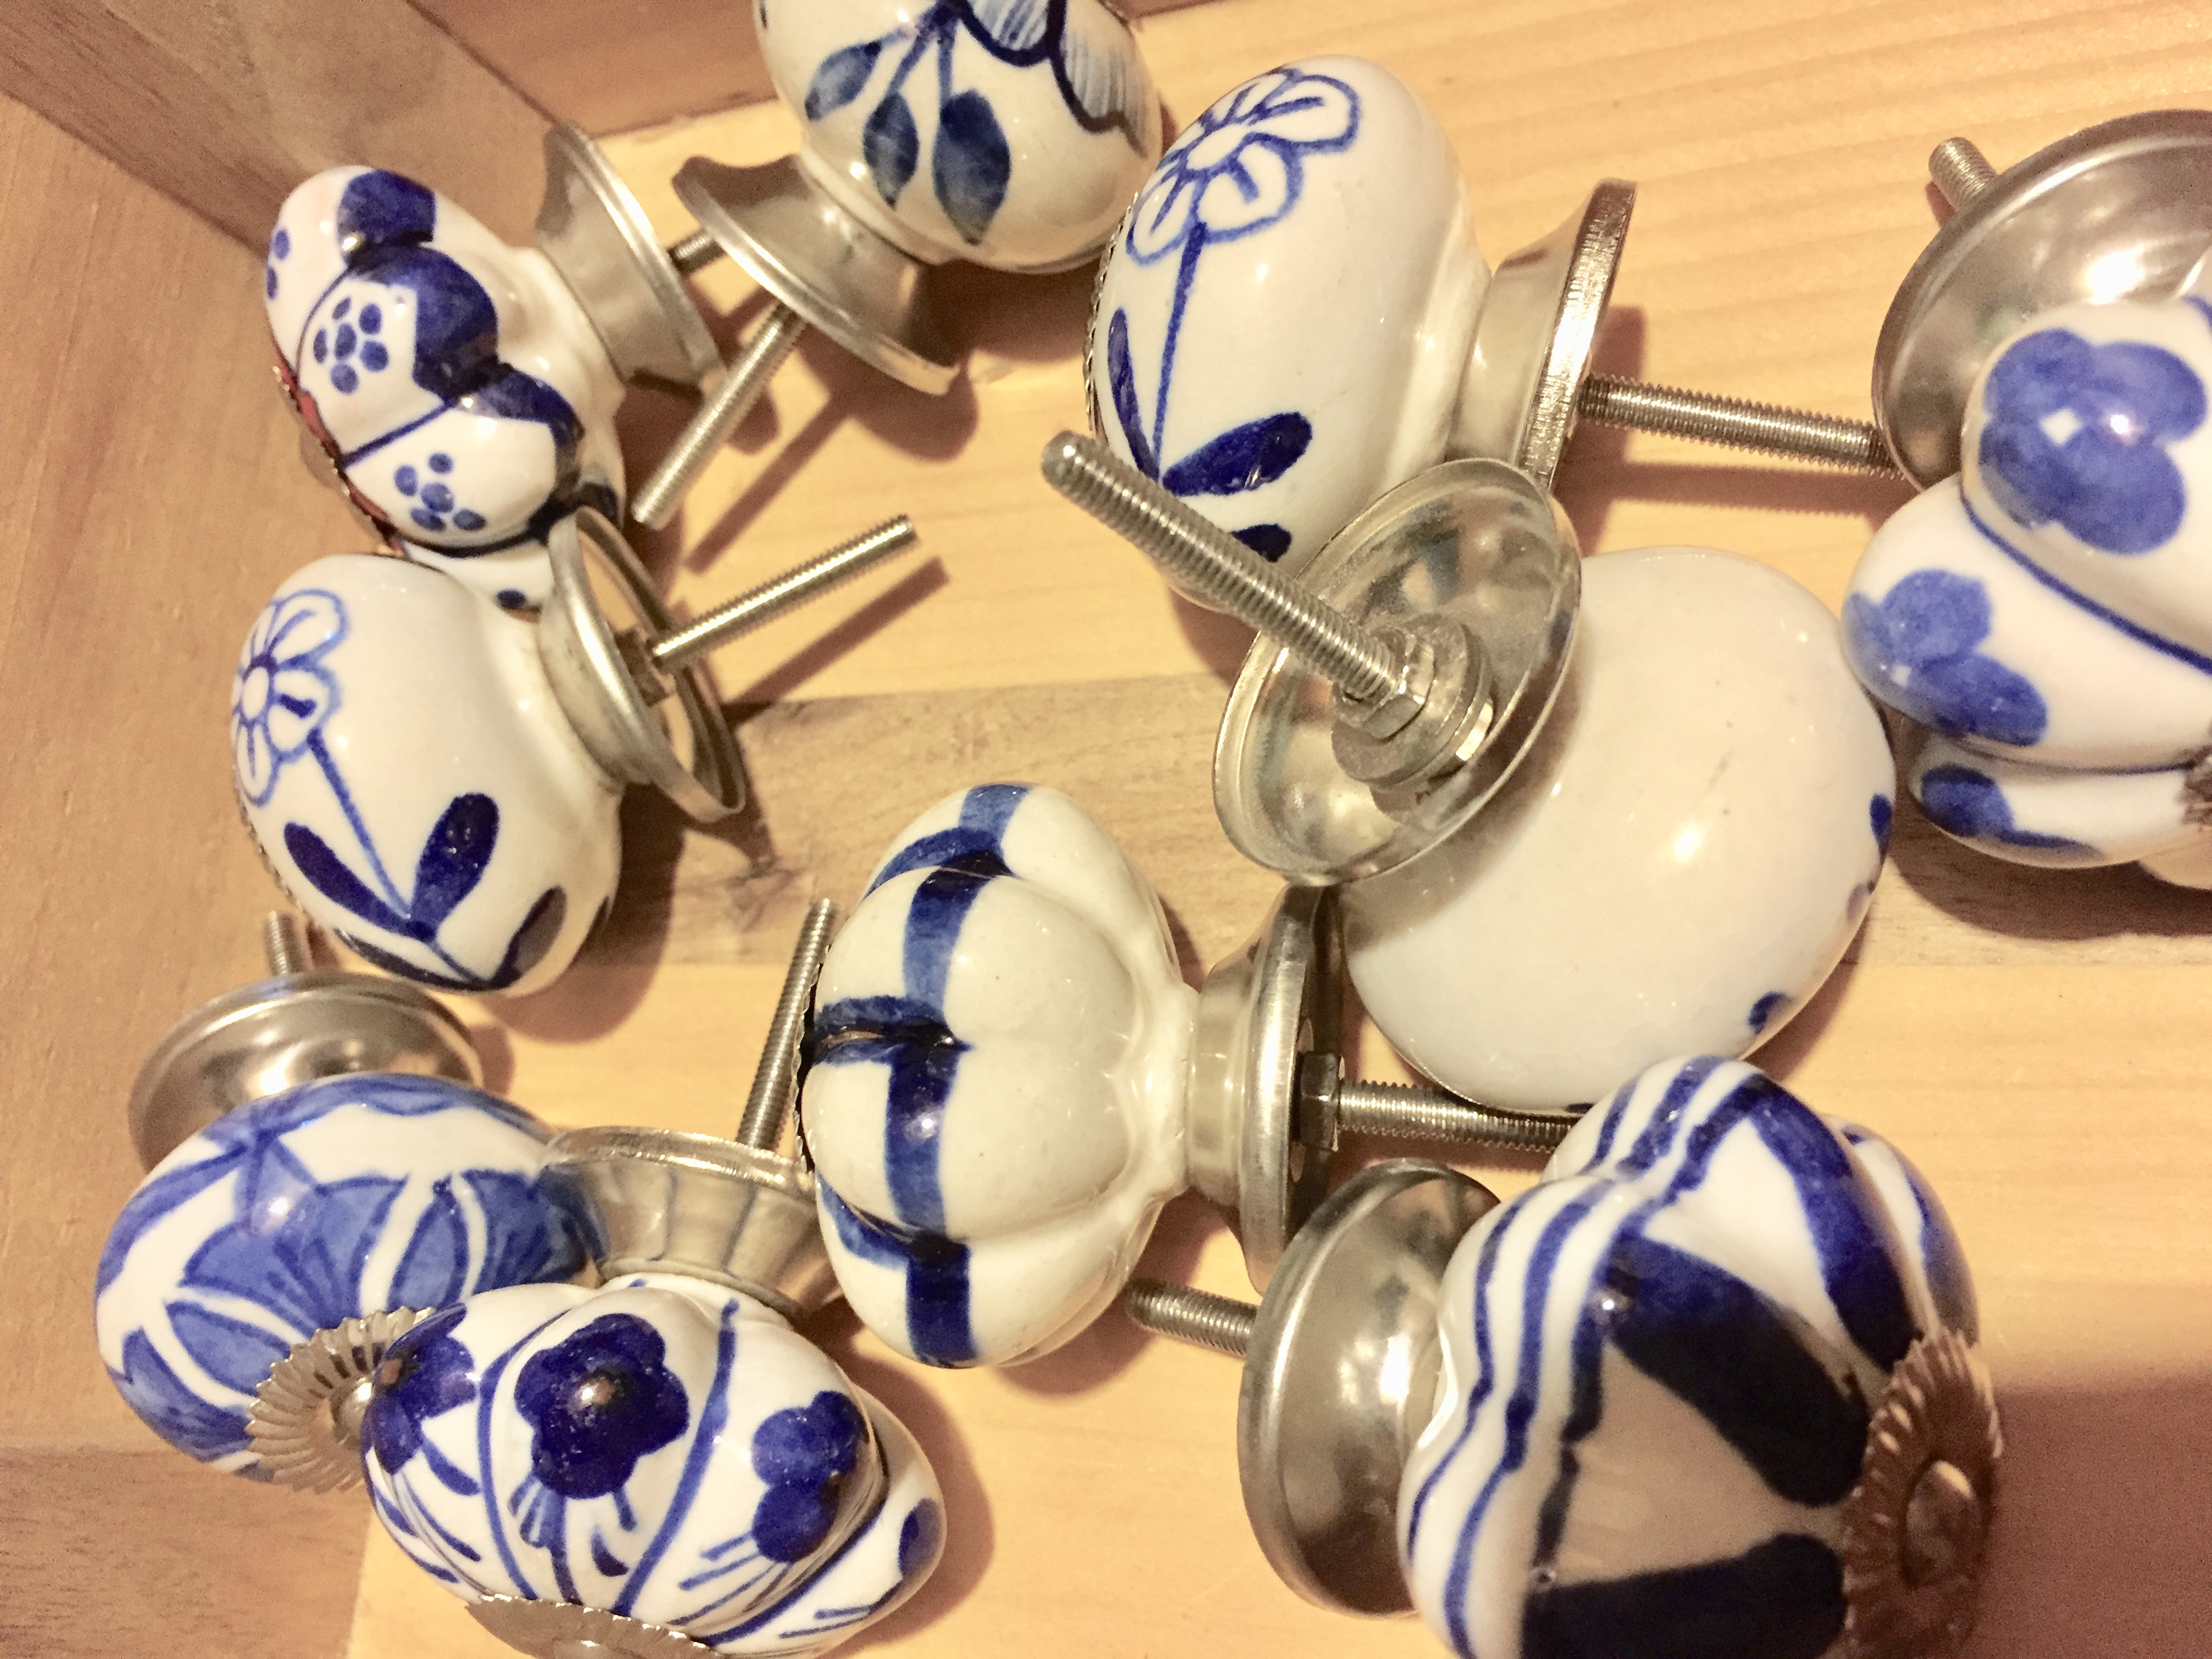
One dreary day toward the end of November, as I was taking stock of my crafting supplies for Christmas projects, I remembered that I had ordered these lovely knobs (quite some time ago!) for some projects to sell at the local market. I ask you, is there anyone who does not love blue and white porcelain? At the time, the price worked out to a dollar a piece. Not bad!
Needless to say, they did not get used immediately (but perhaps I’ll be more productive this winter in preparation for market season). I had some pieces of driftwood, pallet wood and various reclaimed pieces that I’d been hoarding, so I began my plans for a jewelry organizer.
I found a piece that was the perfect length for the space, and began by giving it a quick sanding. I love the rustic feel with its texture and rusty nails and nail holes. I couldn’t decide which side I preferred for the front of my project, the lovely sweeping grain side with interesting cut marks, or the rougher, more consistent side. Thus I went ahead and painted both. Sorry for the distracting patterned tablecloth.


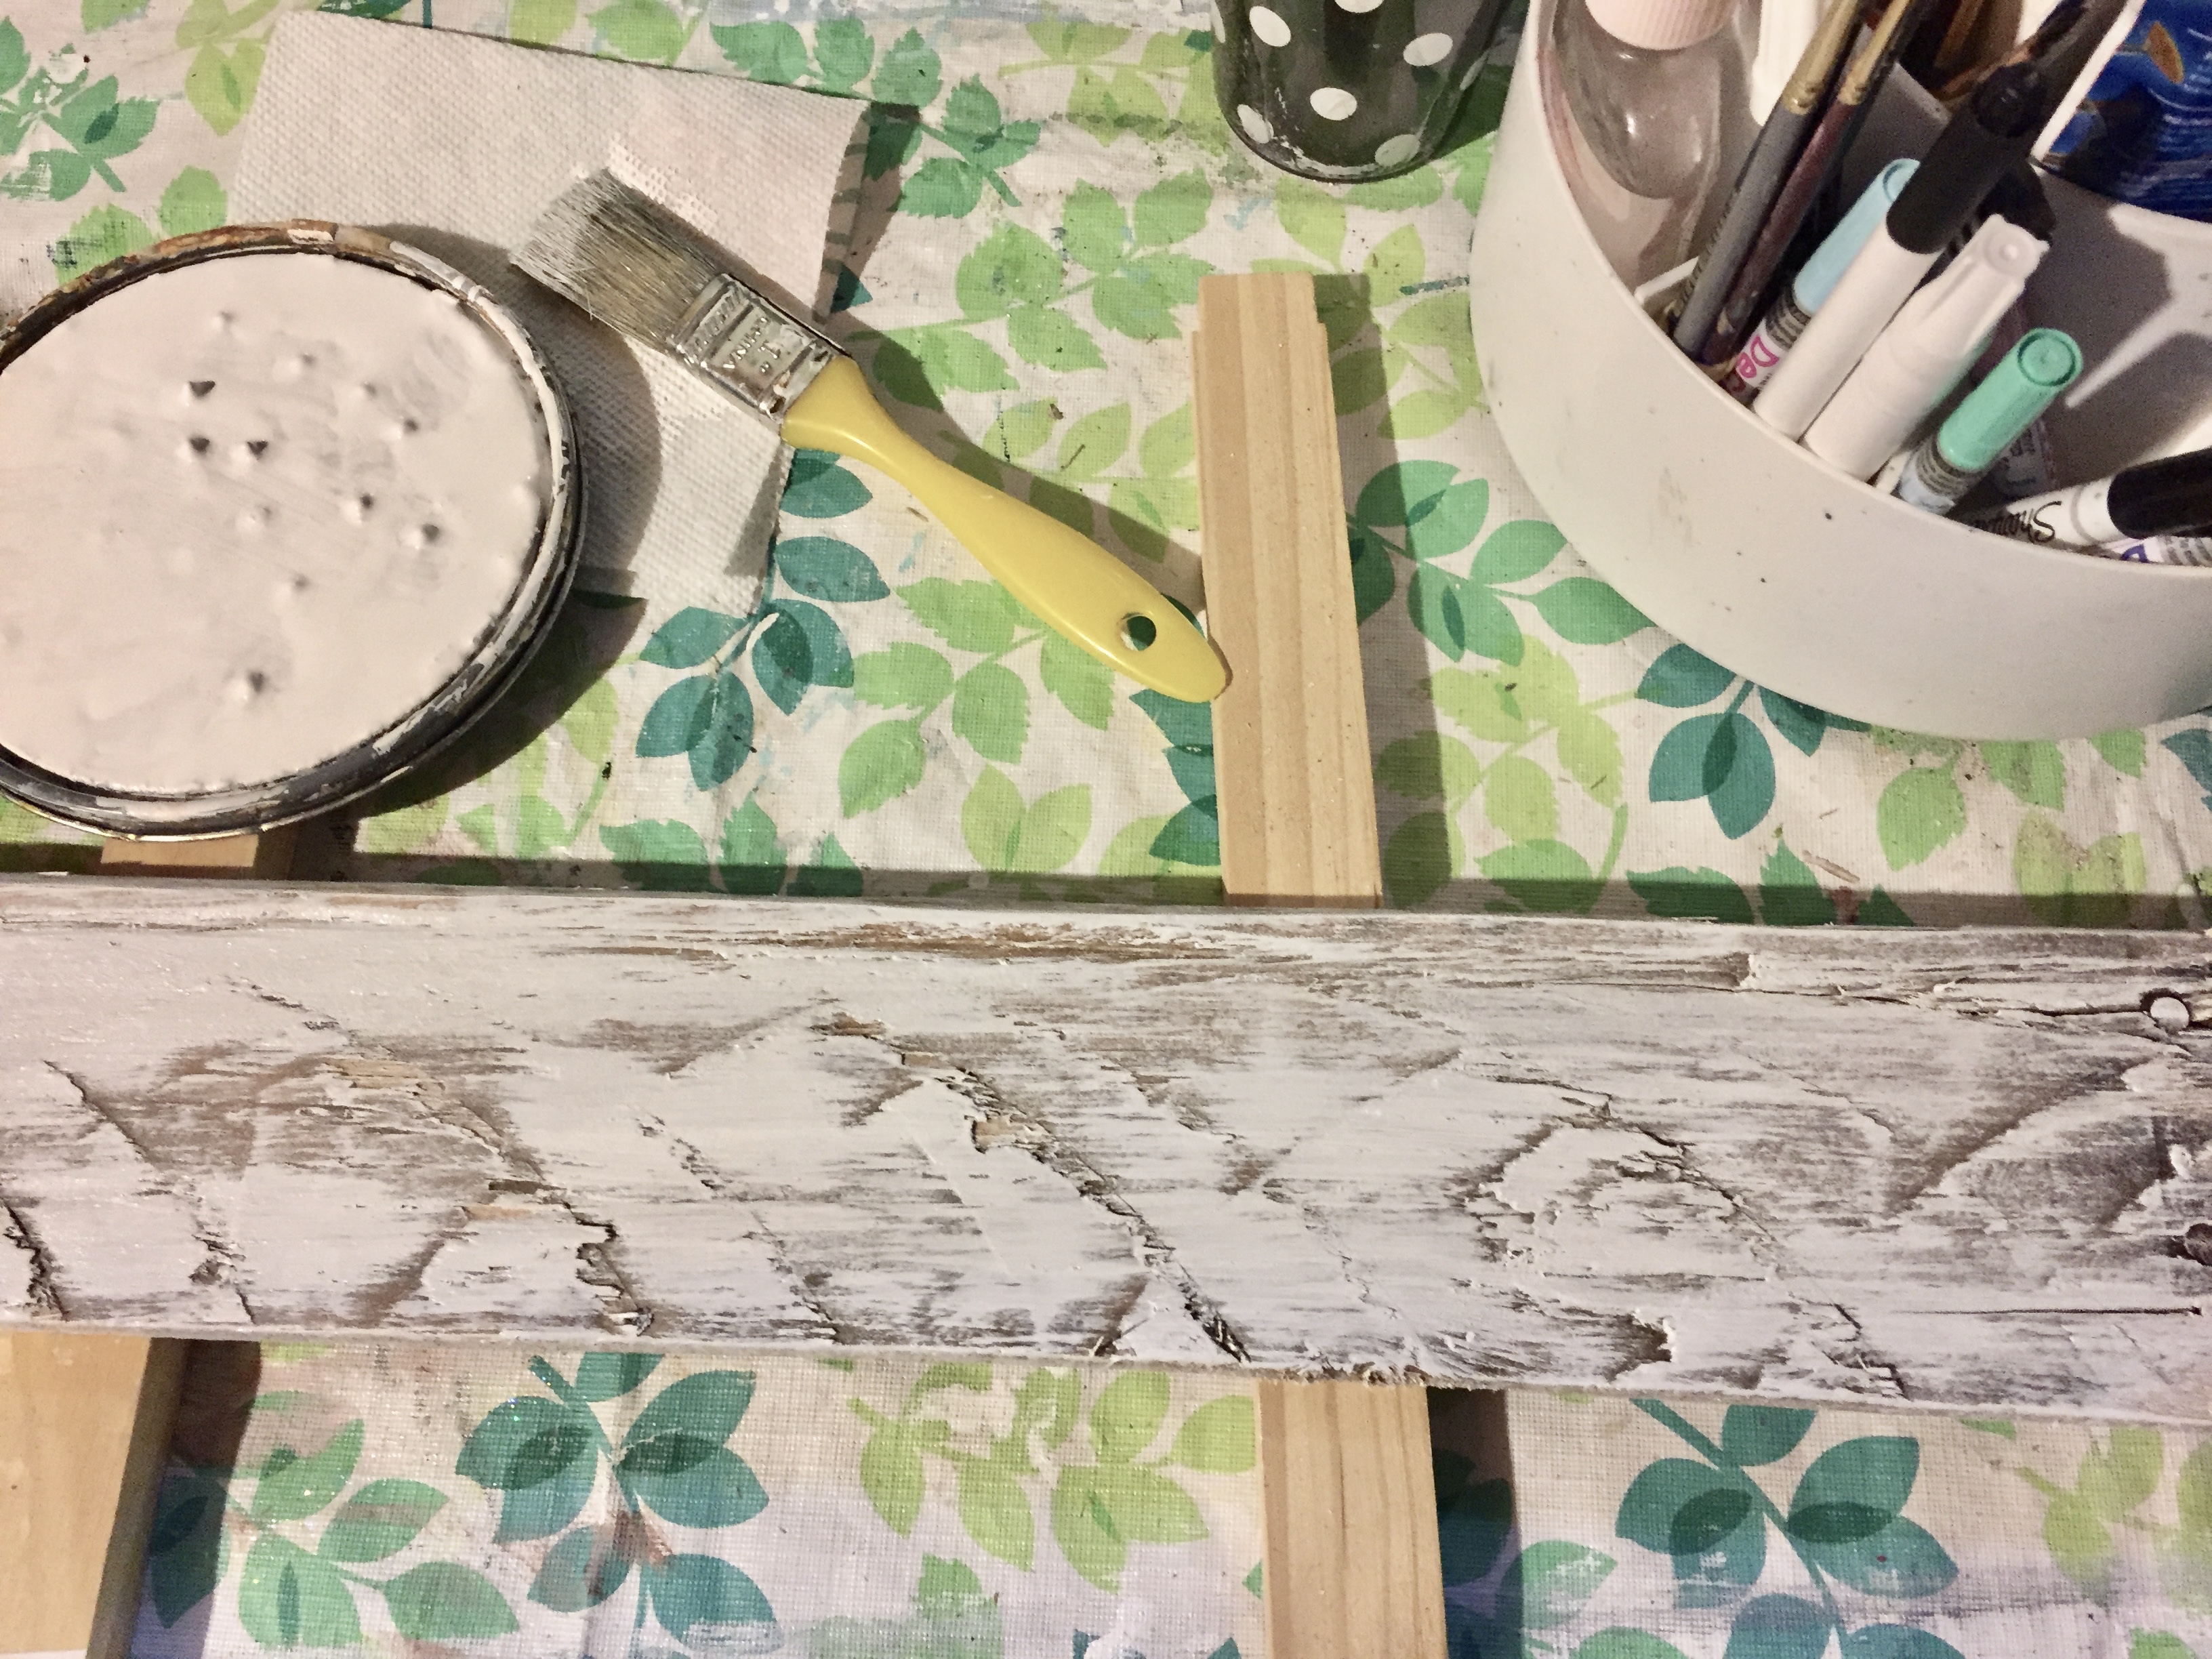
I used a dry brush technique to maximize the textured effect. Dry brushing is just what it sounds like. Using a scruffy, dry brush dipped minimally in paint, then blotted onto a paper towel, you simply brush it, with the grain, onto the board. The paint should just skim the surface, emphasizing the hills and valleys. In this technique, little by little is key. I like to see how I feel about the amount of paint before adding another layer. You really just play around with it until you get the results you desire. Sometimes, I’ll add more paint against the grain, if I feel like it would look better.
In the end, I decided that the more consistent grained side looked better with my patterned knobs.


I chose my knobs and measured my board in order to space them out evenly. I then drilled a hole to fit the diameter of the bolt for each one. On the back of my board, I used a large bit to indent space for the nut, so my organizer would not damage my wall. If you have the proper bit to countersink this, all the better. I couldn’t find one, so I needed to improvise. It did not give the best finished look, but I didn’t mind since it wouldn’t show. Another quick sanding was in order to clean up the burrs.


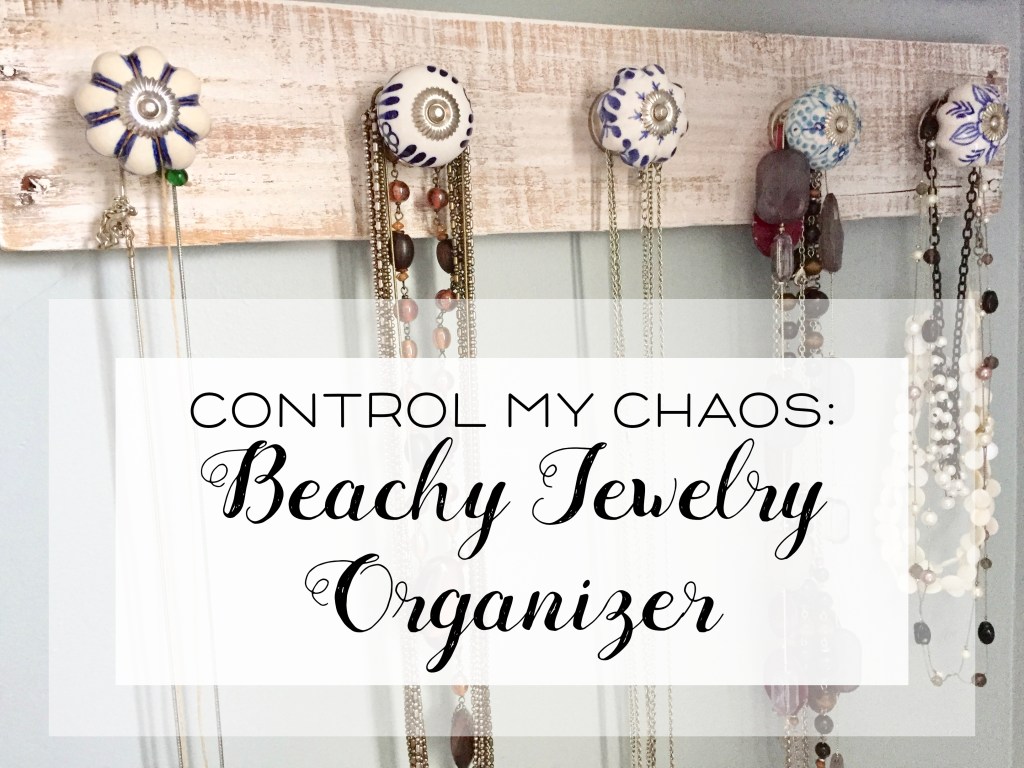
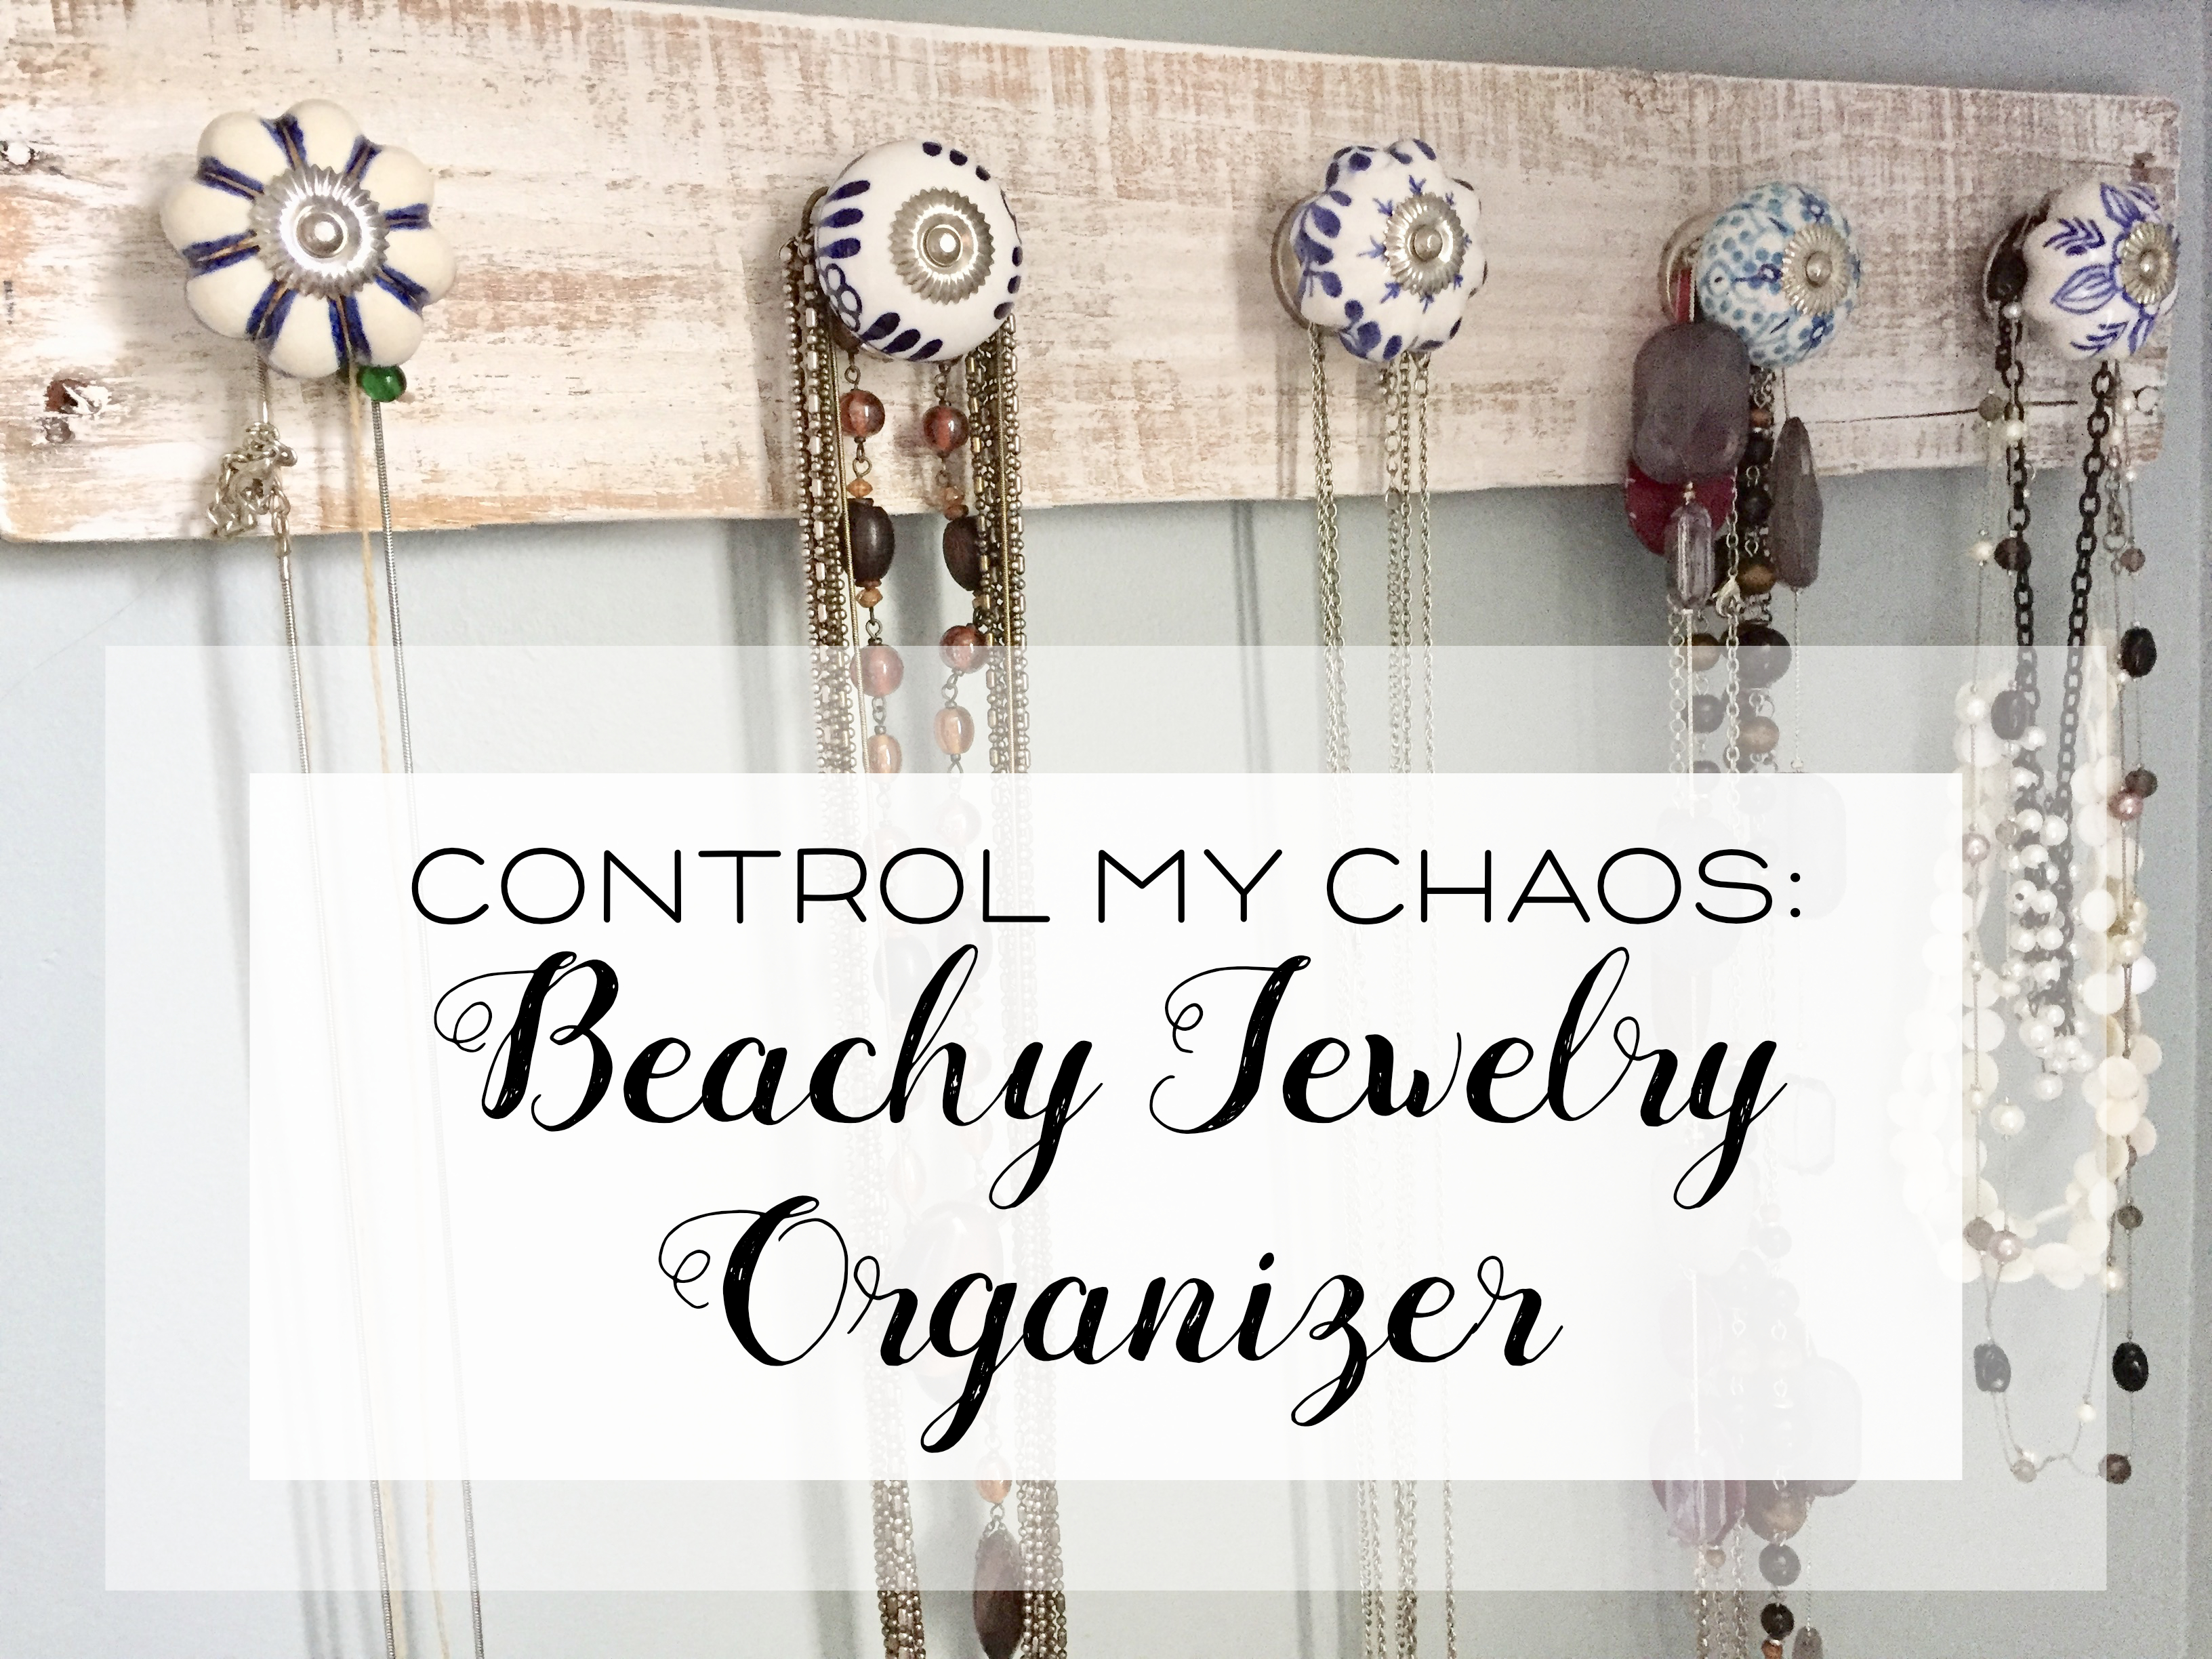
Finally, I inserted the knobs. *swoon* I loved the rustic with the pretty. I had my Love grind off the excess bolt ends, I added a couple of sawtooth hangers and it was ready to be hung.


As I said, it was a dreary day, I was working in my basement, and I only have the camera on my phone, so the pictures are not the greatest. Some day, perhaps, I will be able to invest in a decent camera and I can share better photos with you!
Here it is all set up. Please ignore my messy area. I have a corner in our bedroom for hair, makeup and jewelry stuff and the like. Right now, I’m using baskets, tins and milk glass vases, wooden boxes and my childhood jewelry box from my grandmother to contain the chaos. It keeps everything corralled, but it isn’t very tidy looking. I’ll need to work on that!


Not too shabby (well maybe shabby chic) for a penny-pinching project!
Reclaimed board – free
Knobs – $5
Paint – already had
Sawtooth hangers – already had
An upcycled, five dollar jewelry organizer that is beachy and beautiful.
Join me and others at this link party:
Sweet Inspirations #90
Keep in Touch #3
Happiness is Homemade #204
Merry Monday #188
Creative Gallery #267
Friday Favourites #409
Home Matters #169
Farmhouse Friday #42
Talk of the Town #120


Join me and others at this link party:
Sweet Inspirations #90
Keep in Touch #3
Happiness is Homemade #204
Merry Monday #188
Creative Gallery #267
Friday Favourites #409
Home Matters #169
Farmhouse Friday #42
Talk of the Town #120


Leave a comment