
Do you have a project that has loomed over you for ages?
I have had one. That’s right…I finally got around to painting my df girl’s wardrobe!
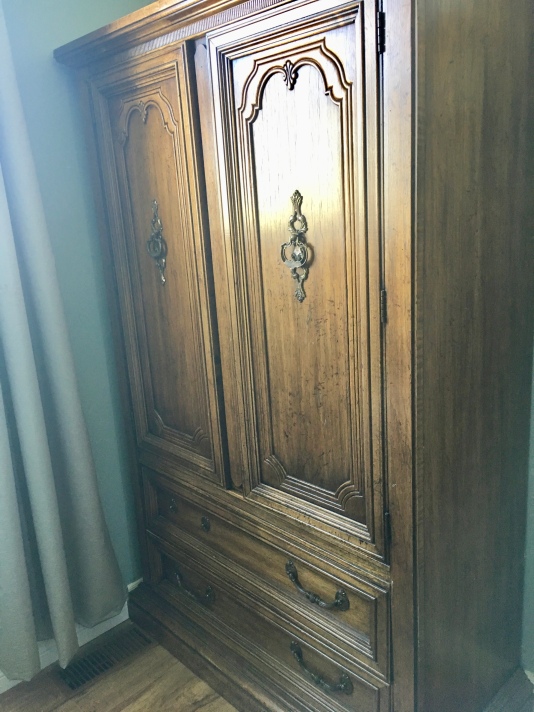
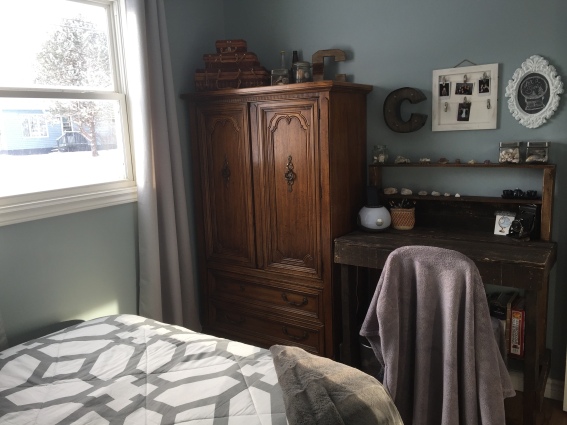 I shouldn’t tell you we’ve had this hand-me-down dresser since 2013, but it’s the sad truth. It is sturdy and practical; heavy as all get out and was dark and clunky, taking up a lot of visual space in my girl’s small room. This wardrobe is dated, but has so much potential for being a cool, vintage-y statement. At this point it just didn’t have the right ‘feel’.
So why, you ask, did it take me so long to tackle this makeover? Half the problem is in the fact that it is so dang heavy. The other half of the problem is that I am a procrastinator. Why do today what you can put off till tomorrow? Mostly I just felt like it would be a major undertaking, and I like quick, get-‘er-done projects.
If you know me, or have visited here before, you know I have a penchant for taking thrifty pieces and painting them white (see here and here). Almost always white. Before coastal and farmhouse was a big deal. I don’t know why. I do not have an aversion to colour. I rather love colour. I even have a ‘colour love’ Pinterest board. I guess I just like the cohesive feeling that you get when you take fun, mismatched pieces and unify them with one colour. The ‘pops’ of colour can come from accessories.
Up until now, I have gone the traditional route to painted furniture: clean, sand, clean, prime, sand, paint, sand, paint, sand, paint, sand, topcoat, sand, topcoat, sand. Oh ya…there’s more cleaning following each sanding. This equates to a lot of time and elbow-grease investment, not to mention stinky fumes.
Because this wardrobe is so cumbersome (just ask the poor men who helped us move this beast several times!), I just kept postponing the painting. I don’t have a garage to work in anymore, so I would need to work outside (which would mean moving in and out over a couple of days, or drag it to the basement to work, which means I would need to haul it upstairs when I was done. No thanks. Enter Pinterest. I know you are going to ask, “Have you been on another planet all these years?” when I tell you I decided to give chalk paint a try. No, I have, in fact, been residing on planet earth and have been very aware of these *in my best old lady voice* ‘new-fangled ways of paintin’ furniture’. It’s just that I have primer, white paint, and varathane on hand already, and I’m very practical that way. Use whatchya got. Plus, chalk paint is not for the frugally-minded–that is until you factor in that you do not need primer or varathane (however wax is recommended). And my time? Well, that is priceless. Also, low VOC–unlike my primer and varathane–and ease of clean up meant I could paint it right in my girl’s room.
So, I bit the bullet and bought some Deco Art Americana Chalky finish paint from Amazon, ’cause we live out in the boonies and don’t have a local Annie Sloane (or similar brands) retailer nearby. This was the only one they would ship way out here. It was C$11 for an eight ounce container; I bought two. I grabbed a creme wax of the same brand, and a package of brushes–one paint, one wax (which I realized later was not entirely necessary)–as well. All in all it was about C$50 to get me going, including the investment in some tools that will be re-used. It was a free dresser, so that’s not too exorbitant.
The initial research I did told me I’d probably need two coats. Perhaps if I’d used the more expensive paint, that would have been true. In the end, I needed three coats, with some areas requiring a fourth. Oh well…the paint dries very fast and goes a long way. I used most of both eight ounce containers to finish this large piece of furniture. That’s pretty good in my estimation.
I won’t get into the nitty-gritty of painting with chalk paint. This is my corner-cutting version, because I am working in cramped quarters. There are loads of tutorials and videos out there to show you the proper way. You can check out my diy board on Pinterest to get you started.
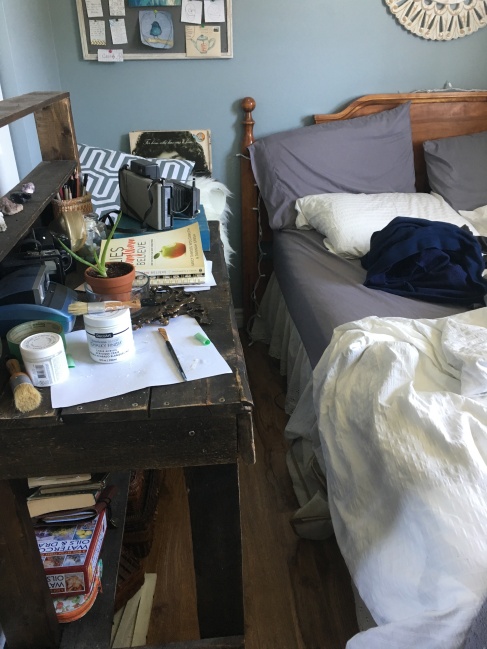
The first day, my df girl wiped it down and removed hardware…well just the pulls. I was a little hesitant about everything closing properly, so I just taped the hinges. I also didn’t want to find a place to put all her stuff and a workspace to paint the empty drawers and removed doors, so I left everything intact and all the stuff inside (I didn’t want to paint inside anyway). Her desk was moved beside her bed. It was a little tight, but she managed for a couple of days. Don’t be shocked by this mess…she actually keeps her room very tidy.
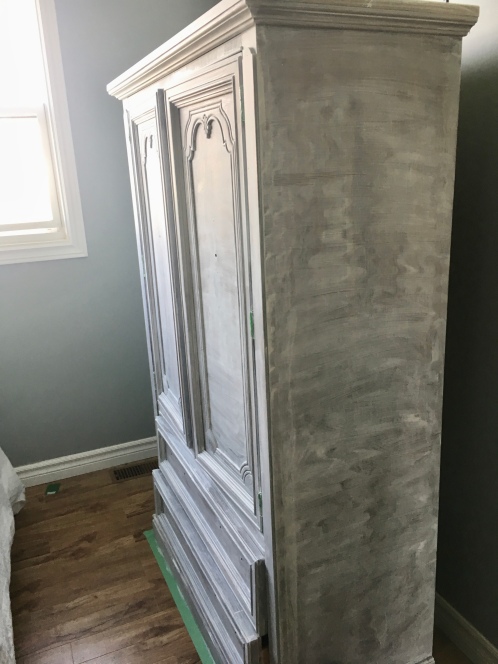


On the second day, I gave the next two coats of paint where necessary and in the evening, I gave it a wax. There are varying opinions on time between coats and the wax. I just waited until it was completely dry (about an hour or so, depending on what I was doing). I waited a good three hours before waxing.


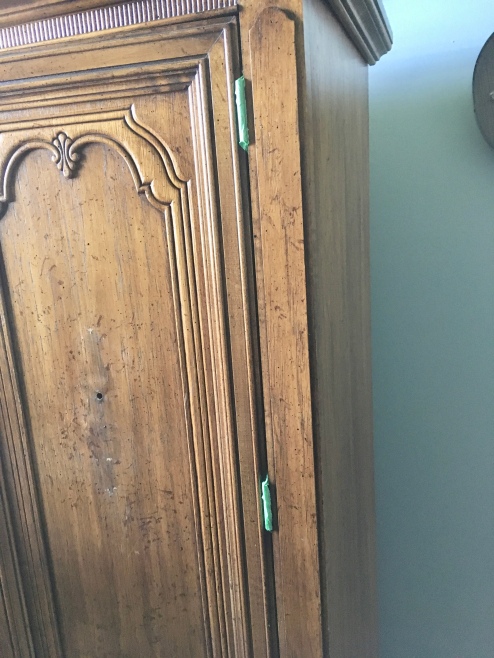
We gave it a light distressing after waxing. I always distress. My theory is that you will inevitably have imperfections in the painting and, also, your painted furniture will get dinged up at some point, and this makes those little mishaps look intentional. We liked the vibe of the old hardware, so they were put back on, as is.
Overall, I think this paint was worth the investment for this particular project. However, I think I’ll still be using the tried and true for smaller projects in the future. The total cost for paint and wax (both of which were mostly used) minus brushes was C$30. I personally would not buy the brushes; instead, I would use a good quality, larger brush and a rag for the wax.

Unfortunately, it needs to be shoved up against the wall to make room for her pallet desk–an essential for my artsy girl.


This was a long time in the making, but I think her room is finally put together. (I’m noticing that the patterned comforter shows through the white cover…better put a plain white duvet on the shopping list. Also that pesky drawer handle won’t stay put!) By the way, while a lot of the elbow grease and suggestions came through me, she was very definite in what she envisioned for her room. My df girl loves vintage-y things: old cameras, LPs, record players and such. She’s also a creative, so much of the artwork is hers. I think it’s a restful retreat that reflects her personality very well!
Here’s a before and after:


What do you think?

Here are my amazon.com picks for this project:
.


Sharing over here…go check out the great ideas!
Happiness is Homemade #220 at Bluesky at Home
Talk of the Town Party #123 at The Interior Frugalista
Farmhouse Friday #57 at The Painted Hinge
Vintage Charm Party #133 at My Thrift Store Addiction

The wardrobe turned out great and looks wonderful in your daughters room. I recently painted a table in home made chalk paint (just add plaster of paris to latex paint) and I love the ease of not having to sand, plus it was a good way to use up some of my paint stash.
LikeLiked by 1 person
Hey, Liz…that sounds like a great idea! I may need to try that next 🙂
LikeLike
The white sure brightens up that dark corner. Glad your daughter liked it; it goes well with the other white accents in the room. Wish I’d had a mom who was invested in what I wanted my room to look like!
LikeLiked by 1 person
Thanks, Kathy! I’m just thankful that my daughter has inherited the love-for-white gene 🙂
LikeLike
How lovely! The power of paint never ceases to amaze me! Thank you for sharing at Vintage Charm–pinning!
LikeLiked by 1 person
Thanks, Cecilia! Glad I stumbled upon your blog…having fun browsing 🙂
LikeLike