
My df girl is anxious to finish decorating her room. It has been a long time (2 years!…see this post, and this one and one more) since she’s been able to do so. While it has been exciting to find things that have been in storage purgatory, some of our belongings are still in another province and this presents some disappointments. She would like to have a desk in her room. Her desk is in storage. Upside…it probably wouldn’t have fit the tight space, anyway.
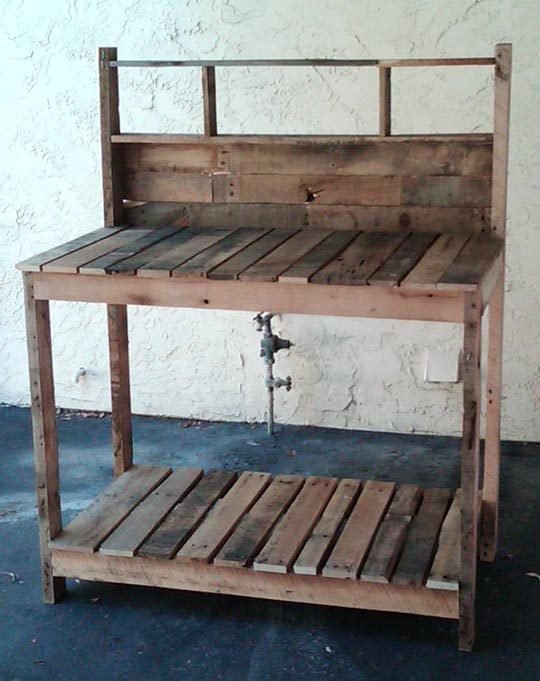
Remedy: we’ve been able to score a few pallets, so…thanks to Pinterest, we will be making one to measure! With our tight budget free is good! I’m also looking forward to working on a project together. We chose this potting bench as our inspiration.
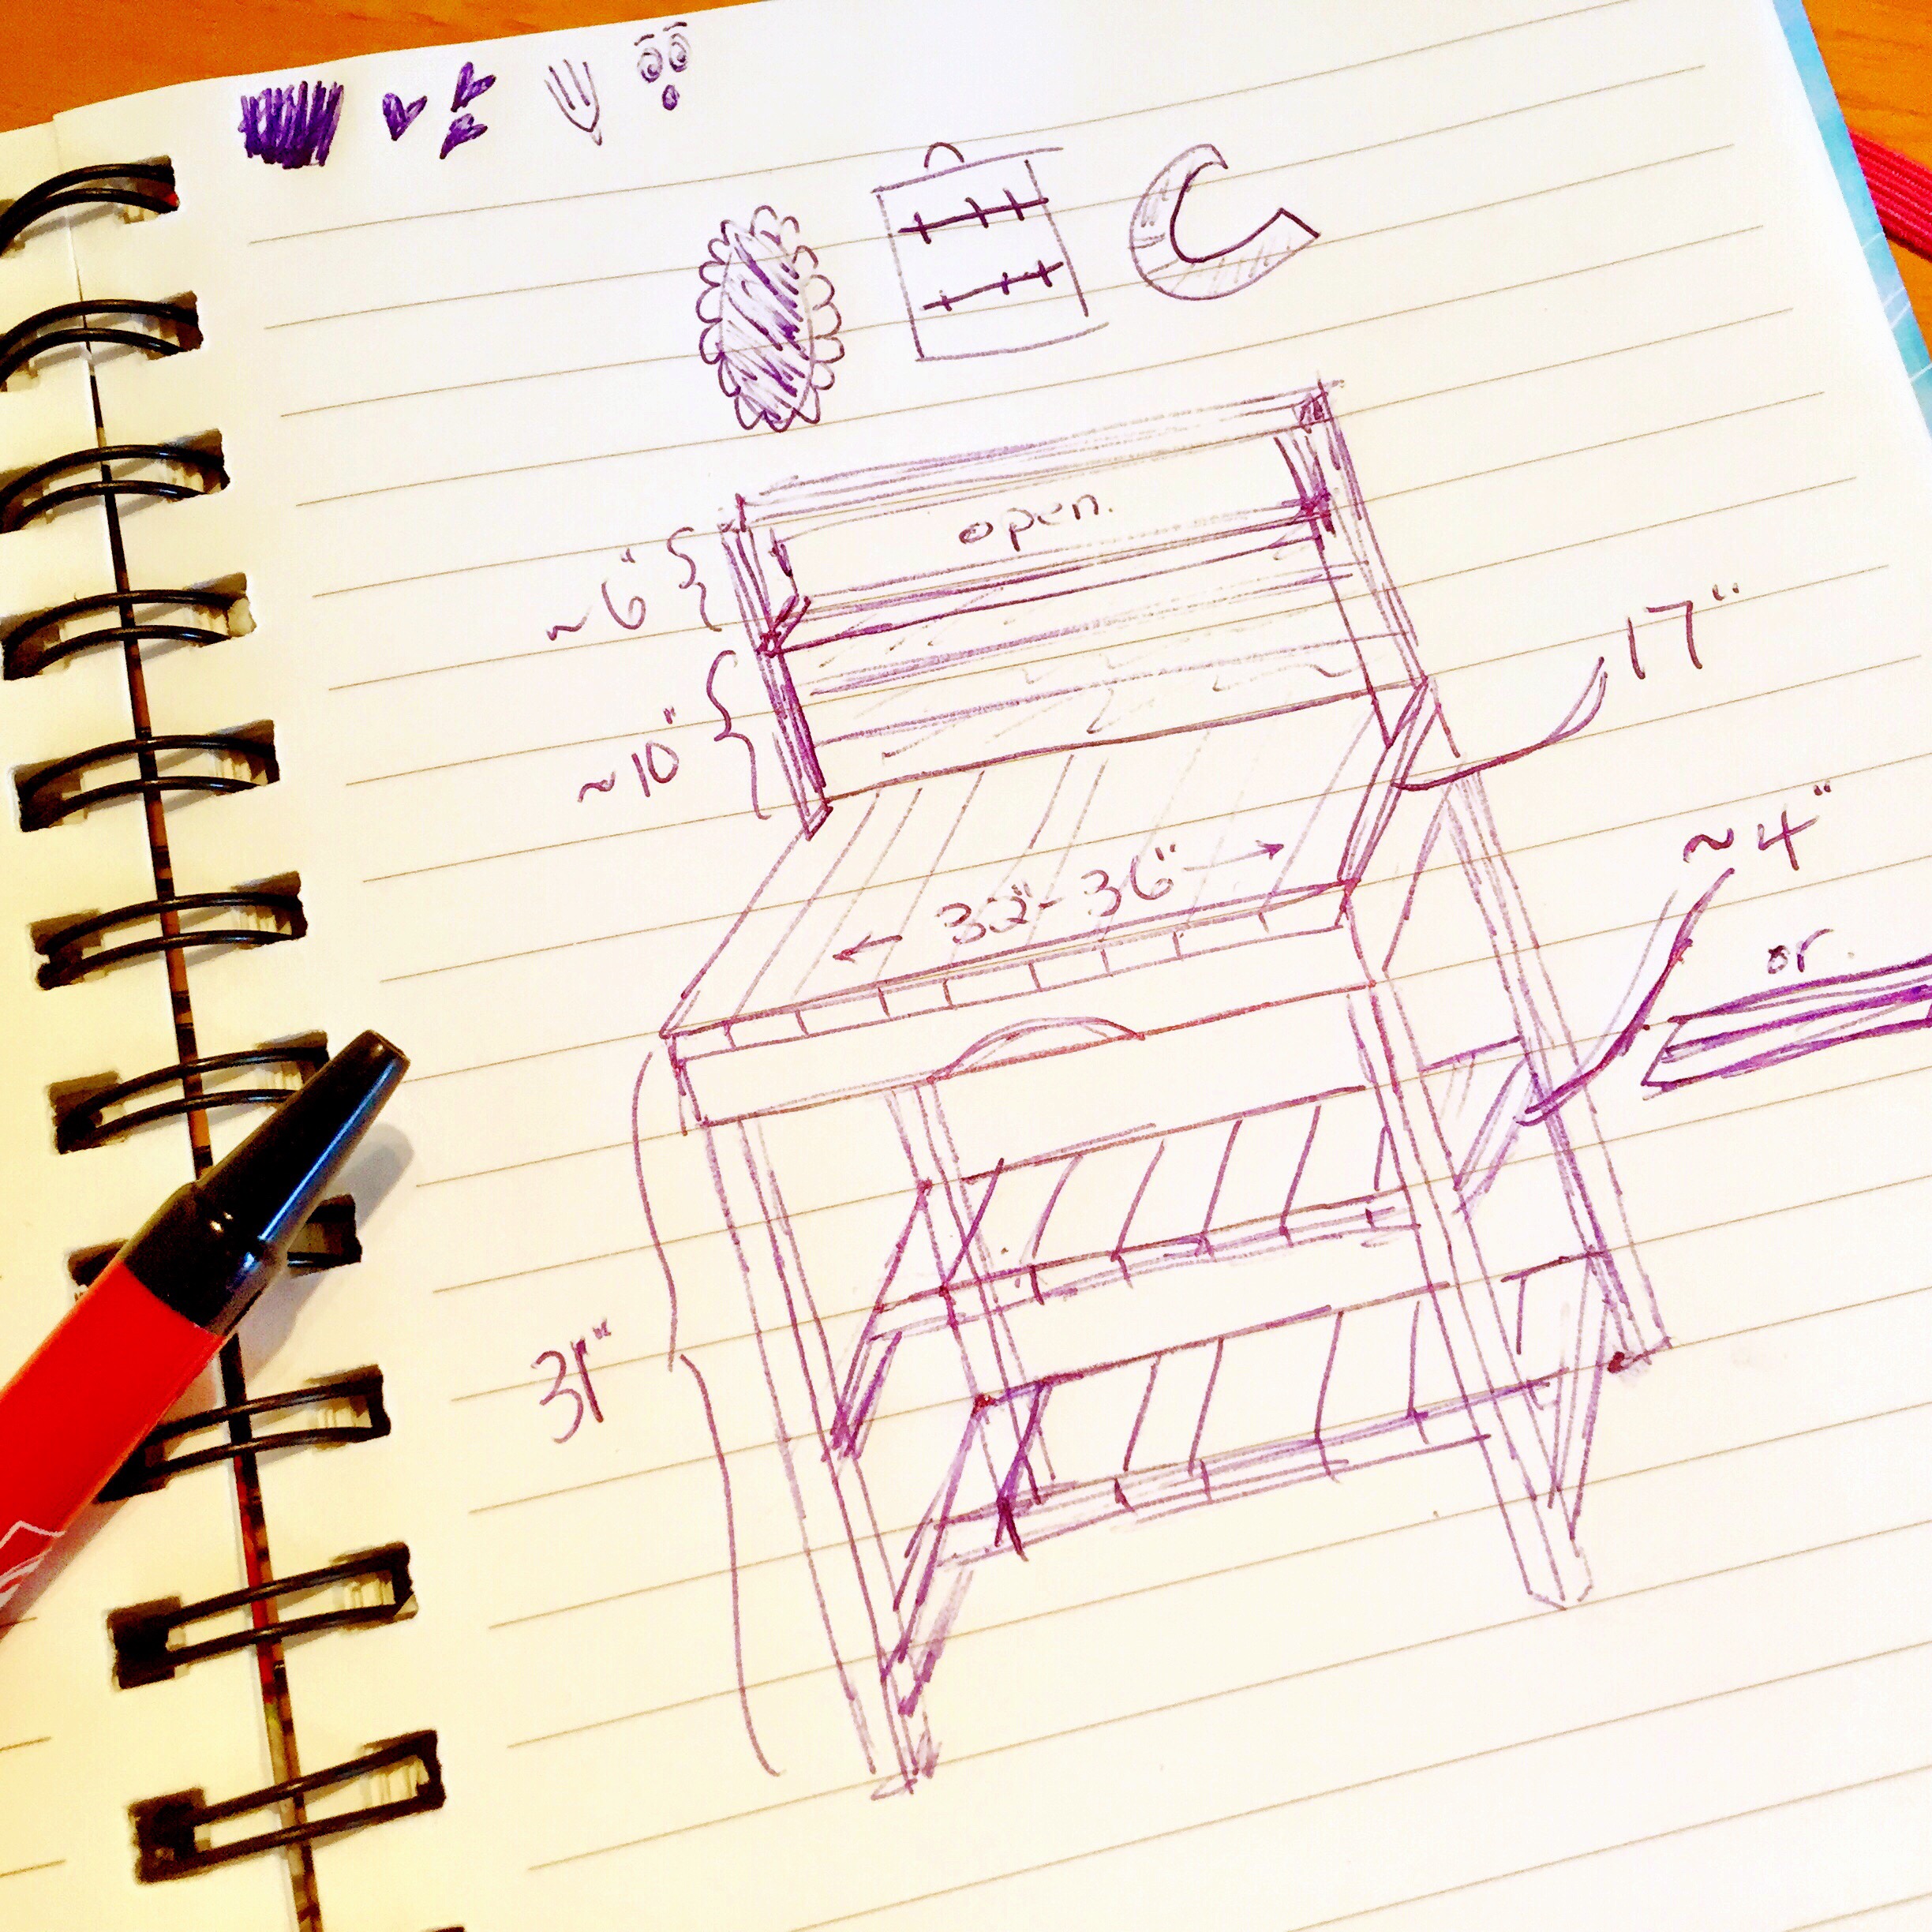
After making some professional-looking plans, we got started.
First things first: dismantle pallets. We watched some videos on dissembling the pallets. Because our sawsall was, in the beginning, in an undetermined location, we decided to try this method first. Ummm…we were not prepared for how torturous it would actually be. It took us a couple of hours to do ONE pallet. I pried it off; my df girl removed the nails. A good system…just hard work. And we did split a few boards. (I’m thinking they might make good signs) Here’s the video (he’s actually building the same potting bench we had chosen):
Free, but not without cost…oooh, my back is aching! Maybe it would help if we can scrounge up something to stand at. Better yet, we located the sawsall and tried this method:
What a difference! Zip, zip, zip and the ends were cut with no nails to remove. It was still a little tricky to remove them from the middle support, but after splitting a couple as I tried to pry them apart, I found twisting them by hand was far more productive.
Here’s the bounty:

Now on to the fun stuff! Organizing and cutting boards to assemble.


My df girl was away when we had a nice day to work on the desk, so my cl boy was quite excited to jump in and use some power tools.


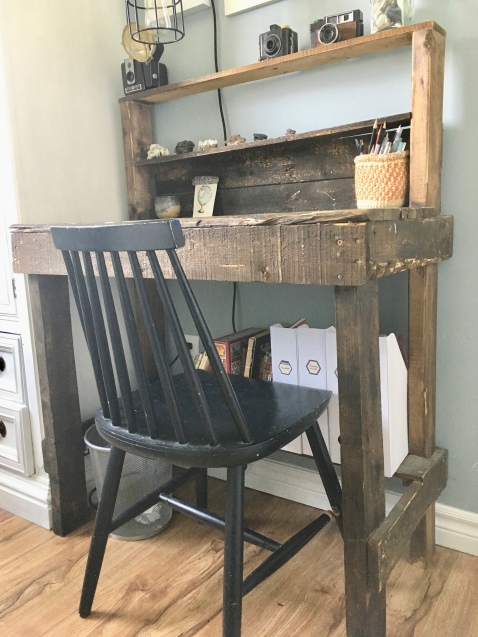
I followed the general procedure for this potting bench, changing things up a bit to suit our needs. You’ll notice that our finished product is not strictly the same as our plan. But oh my, my girl and I both love the rustic feel of reclaimed wood.
Once it was all assembled, I gave it a sanding.


I used a dark walnut stain. Some boards soaked up a lot of stain, so it came out darker than I would have preferred. I wanted a distressed kind of finish; so after it was stained, I gave it another sanding, particularly on the edges.
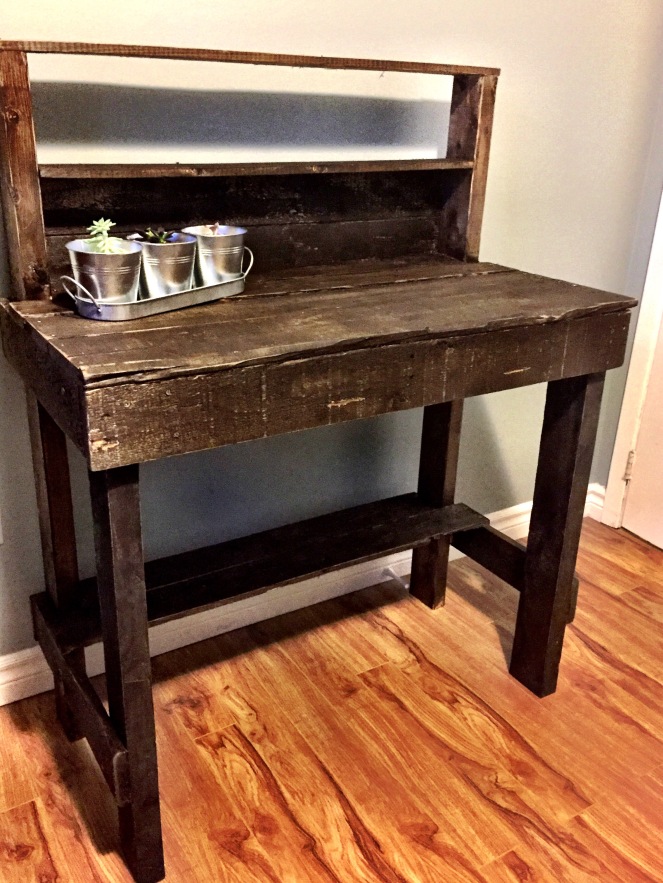
Overall, I’m happy with the outcome, wishing only that the stain was not quite so dark or opaque. The cost was minimal. Other than the long back supports which were cut from a 2×4 stud, a few screws and the stain (most of which we already had), it was a free project. Can’t complain about that! I can’t wait to try a few more pallet projects.
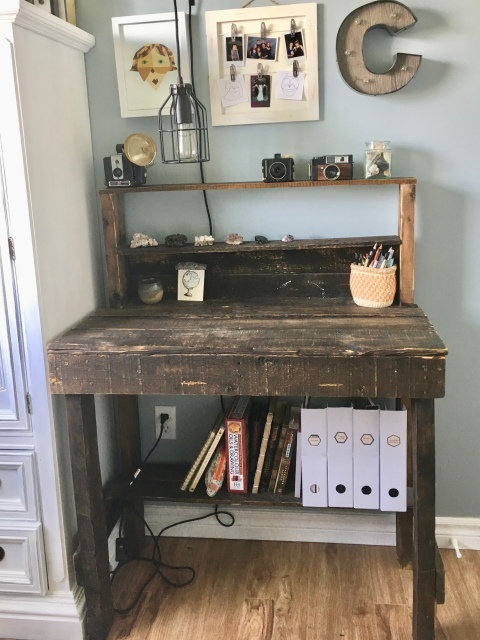
I’m excited for my df girl to return home and dress it up…I’ll keep you posted.
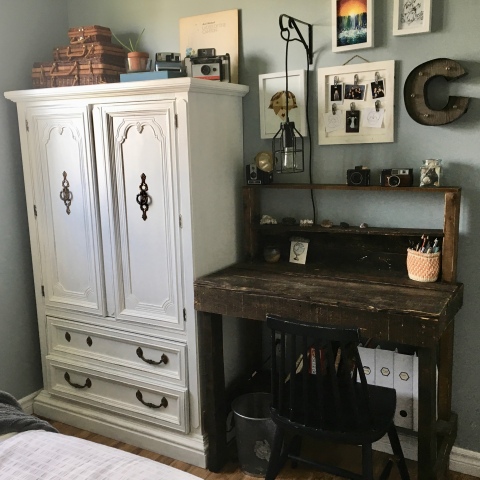
Updated room pictures:
Want to try a pallet project? Check out my Pinterest board, make it {up cycling} for some more ideas.

You can also find me at the Creative Gallery #258 at Making it in the Mountains along with some wonderfully creative people!
Also joining the fun at:
Happiness is Homemade #216 at Bloghetti
Talk of the Town #119 at Hunt and Host
Farmhouse Friday #53 at The Painted Hinge
The Scoop #322 at Cedar Hill Farmhouse
Sundays at Home #44 at My Soulful Home
Snickerdoodle Create Bake Make #228 at Across the Boulevard
That DIY Party #271 at DIY Showoff
Silver Pennies Sunday Link Party #260 at Finding Silver Pennies
Tuesdays @ Our Home #254 at Our Home Away From Home
Thrifty Thursdays at The Thrifty Couple

This turned out so great!!! I had to laugh when you mentioned all the nails and your aching back … ouch. Pallets can be so useful if one takes the time
Yay for you for repurposing
I just created a bench from scrap lumber. http://thriftytonifty.com/thrifty-to-nifty-in-the-caribbean/
It makes the $ stretch
LikeLiked by 1 person
Yes ma’am…a dollar stretcher and back breaker, but definitely worth the effort! Going to go have a look at your bench now 🙂
LikeLike